
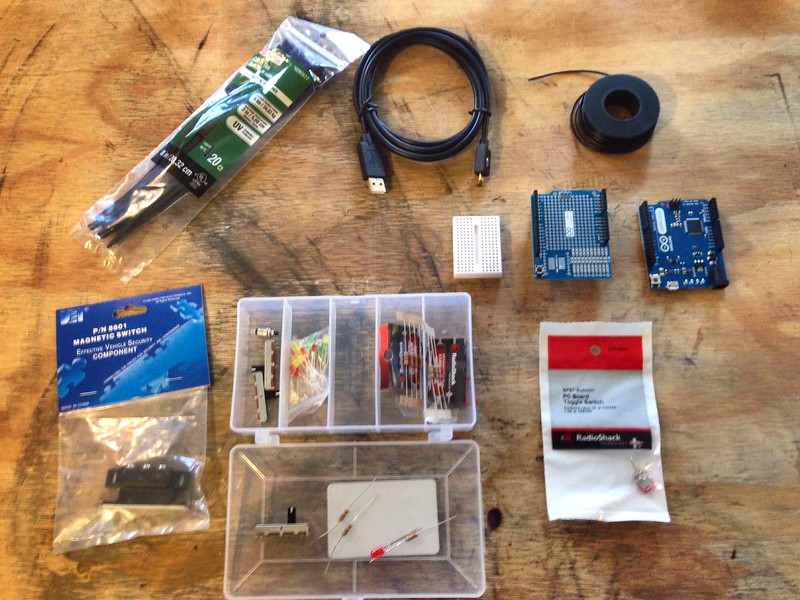
Friday afternoon the last of the parts arrived ahead of schedule. You can see them in the image below. Check out the Assembly Instructions to follow along and build your own prototype.
With parts in hand, I spent most of the day Saturday at Dayton Diode working on implementing the basic walk command. This feature recreates the functionality of the original prototype, simply giving the user the ability to walk in video games by pedaling a bike or elliptical machine. In addition to building the prototype, I also took some time to experiment with documenting OSHW projects. Using the Flickr app on my phone, I took photos of each step (making sure to enter useful titles and descriptions for each photo) and uploaded them to an assembly instructions photo set in Flickr. This let me quickly and easily take notes as I worked which I then copied and pasted into the Assembly Instructions in less than half an hour. Not a bad investment of time to get an entire weekend’s work documented.
By the end of the day Saturday I had things working well enough I could play games. So I went home and “tested” the Holoseat. By which, I mean I played several hours of Star Wars The Old Republic using the new Holoseat. 😉 I was basically pleased, but I noticed a couple of problems.
When I got up this morning, I decided to have a look at the previous night’s bugs. The first thing I did was to add serial debugging using this information on serial i/o (note the special case for the Leonardo) and this information on #ifdef (the #ifdef trick is something we use n C all the time, so it was nice to see it works in Arduino). I should also point out during all of this work with serial communications on the Leonardo, I stumbled upon a little oddity of the Leonardo. It turns out the board takes on two different COM ports in Windows. The first is the bootloader and is only visible when the board first starts up and when it is loading code. The second is the COM port of the virtual serial interface used when the board is running. This second port does not show up in my list of printers/devices in Windows, but does show up in the Device Manager. This second COM port is the one which the Arduino IDE should be set to use so it can automatically upload code correctly and the Serial Monitor can connect to the Arduino.
After I got the serial debug statements working, I found a number of bugs (I will spare you the gory details, but you can take a look at the source code in the SVN repository if you are interested). Thankfully, I was able to address all of the software bugs I found, thanks in no small part to the ability to send debug statement to my PC.
With the software bugs out of the way, I turned my attention to the system level bugs from the night before. While working on one of the issues, I had an inspiration to invert the walk speed calculations from counting steps to timing steps. This let me increase the frequency at which I poll for walking speed so the system can stop walking in under a second as opposed to the original code which could take as much as a second. Testing tonight shows this level of response in stopping is pretty close to what we need (if not exactly what we need). I was also able to deal with an odd stuttering on the first step in a walk cycle, which only leaves one issue from the first night of testing.
Considering the reviews of the reed switch said the magnet was too weak, this is hardly surprising. To be left with only this issue open after the first weekend’s work is great progress. The rest of the week will focus on testing to make sure the basic walk functionality is robust. Look for another report next weekend, when I should start working on the next feature.